This article describes the steps to install DocScanFx versions 3.4.x.x and newer.
Use these links for other versions:
Are you upgrading to v3.4.x.x from a previous version? Click here..
v3.4.x.x New Install Steps
- Download the DocScanFx setup program using the link provided to you from your trial, purchase, or upgrade notification e-mail.
- Run the installer - admin rights are required:

- Read/accept the License Agreement and click NEXT.

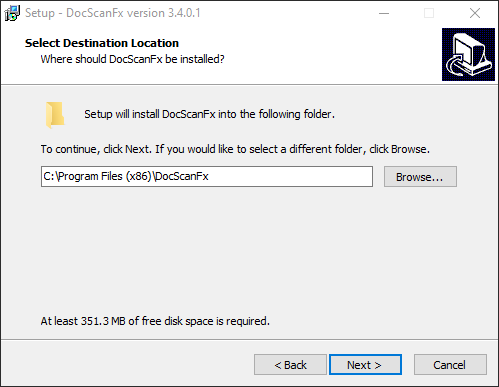
- Only change the install path if required, then click NEXT.
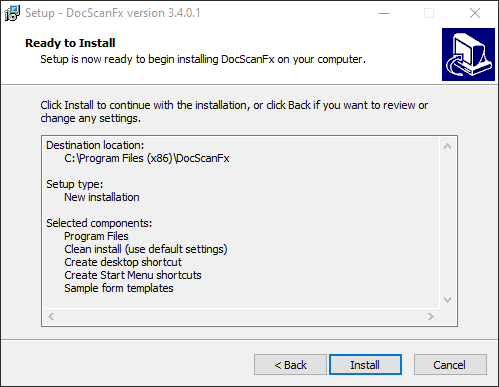
- Choose the New installation and click NEXT. Options:
Choose Dicom Virtual Printer to be able to print from any application into DocScanFx.
Choose Dicom Media Watch to detect DICOM CDs/DVDs/UBS and prompt the user to import.
- Choose iSite PACS Integration install if you have Philips iSite PACS and want to integrate with it. Be sure to review the final integration steps for iSite page once DocScanFx has been installed.

- Click INSTALL.
- After the application is installed click FINISH to allow DocScanFx to run.

- Enter your license key, facility name, and installation location when prompted and then click OK.
- If you need to request a key, you can click on the system ID on this screen to copy it to the clipboard and contact support for a license key.

- Use the Basic Setup Wizard screen to enter your PACS archive's AE, IP, and port.
- Use the Ping, Echo, and Query buttons to test connectivity.
- Optional: enter your PACS Modality Worklist (MWL) settings if you plan to build any workflows using MWL.
- DocScanFx's local AE title defaults to the hostname. Change this if needed and add to your PACS as required.
- Enter your Institution Name and pick your region's Date Format.

- Click Save and Exit and then restart the DocScanFx application.
- Use the Modes menu to select Scan Documents (Multi-Search) and click the Select button.
- Note: A 'Mode' is a group of settings for a specific workflow need.
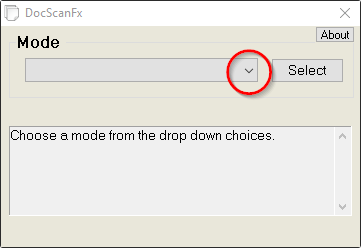
- The Scan Documents (Multi-Search) mode is a search mode where you can use multiple criteria to perform a search in your PACS archive. Test it out.
- Modes can be modified to search a modality worklist or to use different default modalities, time constraints, etc.

- Here's some sample search results. In your search results just double click on an exam to select it for adding images.

- After choosing an exam, click the NEXT button.
- The options on the scan screen can be full customized.
- Adjust which source buttons are available: scan, import, screen capture, forms, virtual print, etc.
- Change the available image tools: invert, gray, rotate, crop, edit, etc.
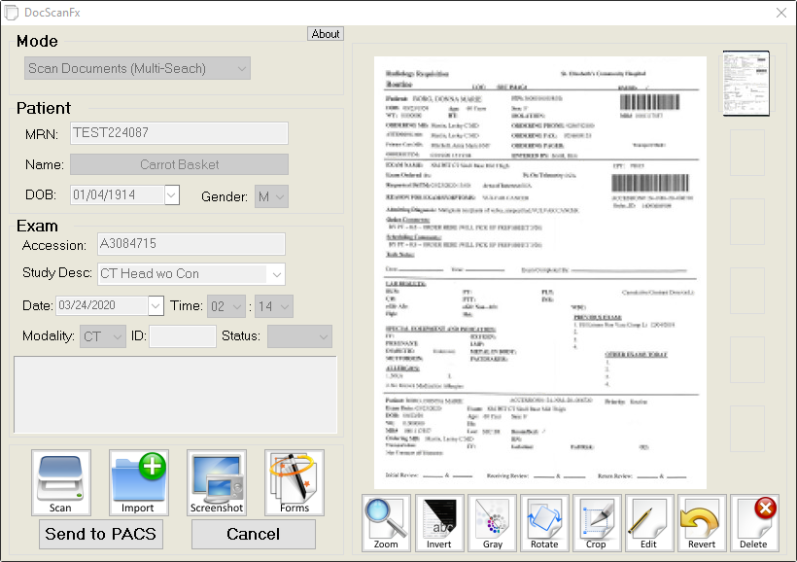
- By default DocScanFx is configured to auto-detect any TWAIN scanners the first time it is run.
- You can adjust scanner properties using the Scan button's right click context menu:

- The Import button can be used to import image files (jpeg, bmp, gif, multi-page TIF, etc.) and PDF. Note that PDF files are converted to images and not DICOM encapsulated.
- Use the ScreenShot button to capture relevant information from your screen, like your EMR or RIS, and insert it as an image in the exam.
- The Forms button has several examples of how you can convert your paper documents to electronic forms with features like:
- Auto-filled in fields from the image's DICOM tags
- Drop down menus
- Check boxes and more!

- Click the Send to PACS button to send the images to your PACS archive.
- You have only seen a glimpse at what DocScanFx can do. Learn and try more with these links:
- Virtual Printing: Print from any application to the DocScanFx Printer in order to send them to your PACS.
- DICOM Importing: Try the CD import mode in the Modes drop down list for importing DICOM media. Note this is only a basic CD importing mode - there's so much more. Check out our CD importing article here. Make importing even easier for your users with the detection of inserted DICOM media can be done with the Dicom Media Watch application - view this video to learn how to use and configure it.
- Modes: 'Modes' are an amazing way to package the workflow settings so your end users don't need to make changes in the application.
- Learn more about modes here.
- Discover how to change the search screen look in a mode here.
- See more of what you can do with modes here.
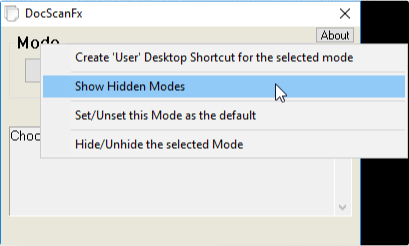
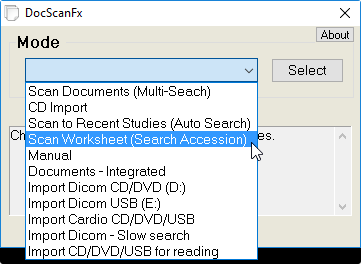
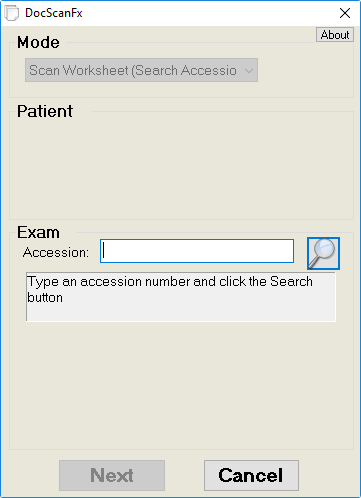
- Test out example modes: On the first DocScanFx Mode selection screen, RIGHT click on the word "Mode" and use the context menu to show some extra hidden modes you can test out. Other options in the context menu will allow you to permanently unhide select modes.
- PACS Integration: DocScanFx can launch directly from many PACS systems - avoid all the search screens! Are you a Merge PACS or Philips iSite PACS user? Check out the integrations page here. DocScanFx supports XML or command line argument integrations, or tell us what your PACS needs and we'll build it!
- INI Settings file: Almost all of DocScanFx's settings are stored in an INI text file which makes remote administration of the application as simple as accessing a user's hard drive. Learn more about the DocScan.INI file here.
- Settings Documentation: There are over 40 pages of INI file settings that can be used to add or remove features, adjust workflow, and make DocScanFx do just what you need it to. Look for the DocScan INI Settings v3.4.x.x.pdf file in your installation directory's Resources folder, or in the Start Menu shortcuts for DocScanFx. More information here.
- More Info: Be sure to browse our support pages at support.DocScanFx.com for more information on customizations.
- Support: Having trouble? Need help making DocScanFx conform to your will? Open a help desk ticket at support.DocScanFx.com or e-mail help@PacsLogic.com.


Choose Dicom Virtual Printer to be able to print from any application into DocScanFx.
Choose Dicom Media Watch to detect DICOM CDs/DVDs/UBS and prompt the user to import.
- Choose iSite PACS Integration install if you have Philips iSite PACS and want to integrate with it. Be sure to review the final integration steps for iSite page once DocScanFx has been installed.


- If you need to request a key, you can click on the system ID on this screen to copy it to the clipboard and contact support for a license key.

- Use the Ping, Echo, and Query buttons to test connectivity.
- Optional: enter your PACS Modality Worklist (MWL) settings if you plan to build any workflows using MWL.
- DocScanFx's local AE title defaults to the hostname. Change this if needed and add to your PACS as required.
- Enter your Institution Name and pick your region's Date Format.

- Note: A 'Mode' is a group of settings for a specific workflow need.

- Modes can be modified to search a modality worklist or to use different default modalities, time constraints, etc.


- Adjust which source buttons are available: scan, import, screen capture, forms, virtual print, etc.
- Change the available image tools: invert, gray, rotate, crop, edit, etc.

- You can adjust scanner properties using the Scan button's right click context menu:

- Auto-filled in fields from the image's DICOM tags
- Drop down menus
- Check boxes and more!

- Virtual Printing: Print from any application to the DocScanFx Printer in order to send them to your PACS.
- DICOM Importing: Try the CD import mode in the Modes drop down list for importing DICOM media. Note this is only a basic CD importing mode - there's so much more. Check out our CD importing article here. Make importing even easier for your users with the detection of inserted DICOM media can be done with the Dicom Media Watch application - view this video to learn how to use and configure it.
- Modes: 'Modes' are an amazing way to package the workflow settings so your end users don't need to make changes in the application.
- Learn more about modes here.
- Discover how to change the search screen look in a mode here.
- See more of what you can do with modes here.
- Test out example modes: On the first DocScanFx Mode selection screen, RIGHT click on the word "Mode" and use the context menu to show some extra hidden modes you can test out. Other options in the context menu will allow you to permanently unhide select modes.


- PACS Integration: DocScanFx can launch directly from many PACS systems - avoid all the search screens! Are you a Merge PACS or Philips iSite PACS user? Check out the integrations page here. DocScanFx supports XML or command line argument integrations, or tell us what your PACS needs and we'll build it!
- INI Settings file: Almost all of DocScanFx's settings are stored in an INI text file which makes remote administration of the application as simple as accessing a user's hard drive. Learn more about the DocScan.INI file here.
- Settings Documentation: There are over 40 pages of INI file settings that can be used to add or remove features, adjust workflow, and make DocScanFx do just what you need it to. Look for the DocScan INI Settings v3.4.x.x.pdf file in your installation directory's Resources folder, or in the Start Menu shortcuts for DocScanFx. More information here.
- More Info: Be sure to browse our support pages at support.DocScanFx.com for more information on customizations.
- Support: Having trouble? Need help making DocScanFx conform to your will? Open a help desk ticket at support.DocScanFx.com or e-mail help@PacsLogic.com.
